Today is my third complete day with Proxmox. It’s been a while since I installed it, but of course my schedule means I can’t find long stretches of continuous time windows to work on it; only a couple hours at a time, if not a fraction of an hour. I also wanted to take my time to make the architecture right from ground-up; I’ve been reading things on my coffee breaks, listening to podcasts and Udemy courses while commuting or walking the dog, and having conversations with LLMs. So it’s time to create my first VM template. What? Why? How? Grab your coffee and read on.
What is a Template?
In this context, a template is actually what AWS or any other cloud infra would use to fire up your new VPS instance or any VM they would use to perform what you want it to do -Amazon launches a VM that you don’t see if you use container workloads as in EKS. Think of it as a naked operating system, without any machine identifiers, SSH keys, users, and anything that’s unique for an OS. It is not meant to be bootable and modified in any way. Launching a VM means cloning that “really naked system”, running some prep tasks like adding a SSH key or a user (commonly with cloud-init), and give you a new system which actually consists of “what’s copied over from the template” plus “what you asked it to prepare before the first time you log in”. If you have used AWS EC2, you know this as the user file. Any new VM starts life at this same stage defined by the template and some process like cloud-init; practically, cloud-init is the de-facto standard.
Why would you want a template?
This is where I’d say, as all-things-IT, “depends on your workload and flow”, but I believe this one deserves a lot more attention than most, and it is worth the time you spend learning how to create templates . The needs of the many outweigh the needs of few.
First, let’s see what we want to do:
- We want to launch multiple, some short-lived, VMs quickly, either for testing purposes, or as development environments. Our task is the work itself, not the underlying infrastructure, so we don’t want to configure everything, repeatedly, each time we create a VM
- We want a standardized base, on which we will use tools like Terraform or Ansible to provision or configure. We don’t want config drift, or think about the underlying resources separately for multiple platforms -in other words, we want less moving parts
Now some of the ways a template will help:
- Quick deployment. You simply skip the installation wizard and most initial config you would do for a new machine.
- IaC readiness. Standardized builds will make things simpler; you already know what’s in there and what’s not for your templates. Resource/config management by Terraform/Ansible/others become more deterministic. Couple this with IaC, you could have a flock of VMs up in no time.
- Security. For a home setup, it’s not that big of a deal. But I am not a fan of leaving password authenticated ssh sessions just to push my keys later on a cloud machine like my VPSes.
- Config drift. Config drift can have an impact even if you didn’t run a lot of machines. We, humans, will forget what config we did 6 months ago on the same OS, causing our machines to diverge more than we want as time goes by
- Disk space efficiency. We usually just create a “linked clone”, where the template disk is only referenced in the new VMs, with each VM adding their own content. So when you launch 10 new VMs from a template that occupies 20GB on disk, you won’t lose 200GB of disk space. Total occupied space will still be around 20GB (excluding small amounts of data just from starting to use), and even that is if you also count the template -otherwise, close to zero.
How do we make a Proxmox template?
Primary way of doing this in Proxmox seems to be very similar to what you would do with bare KVM. With “manual KVM”, you would create a VM, intended to be your template. Update and if you want, install tools you want every new VM cloned from this one to include. Then do a clean-up (Windows people know this as sysprep). Make the image file read only. Then use this image as a base for your clones. The step where you prepare differs between platforms; as said, Windows has sysprep; with Linux, you would probably want to set up cloud-init, or for some distros, you would use the specialized installer option like OEM install with Ubuntu.
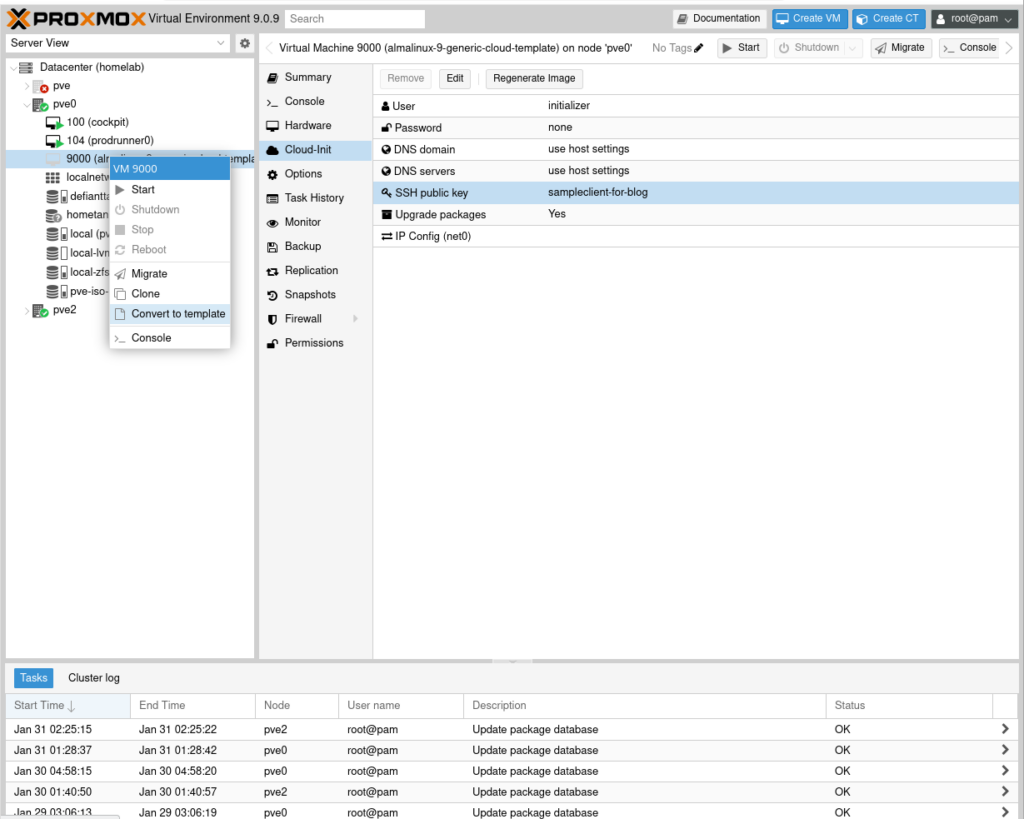
On Proxmox web gui, you can simply use Proxmox’ own wizard to create a VM, do the preperations as you would with any method (this part is none of Proxmox’ business), then use the Web GUI to turn the VM into a pumpkin… No, sorry, a Template.
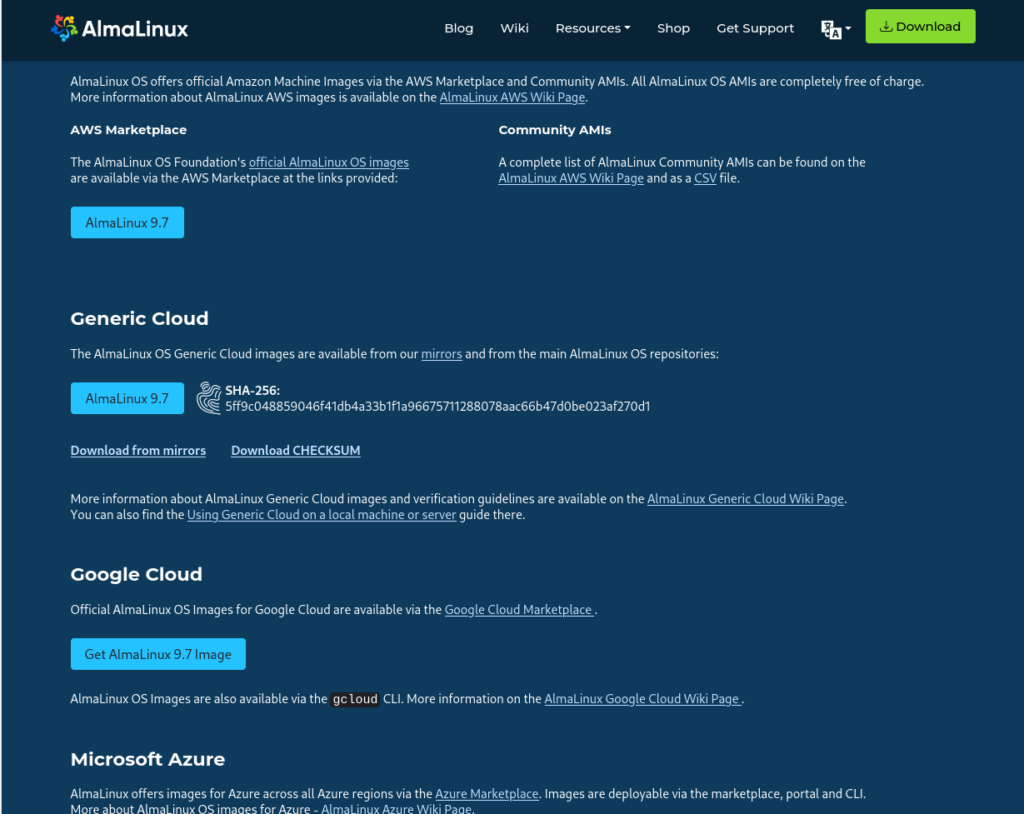
I however wanted to see how it works with AlmaLinux generic cloud images. Last time I checked, RHCE exam was based on RHEL 9, so I’m going with AlmaLinux 9 just to keep myself familiar with RHEL 9.
And that of course sent me down a rabbit hole, not too deep, thankfully. I believe most of this should be doable from the web interface and will try later, but I just followed the documentation for the time being as I intend to launch my first VM using Terraform tonight.
So we start with downloading the image. Remember that this is not an installer, but rather an installed system, so we get a qcow2 image file rather than the usual ISO. Think of this file as your “system hard drive”. We upload this somewhere in Proxmox. To skip the long explanations for shared and local storage, I’ll simply copy the image file to the /tmp folder in one of my nodes.
scp ~/Downloads/AlmaLinux-9-GenericCloud-latest.x86_64.qcow2 root@192.168.1.25:/tmp/I am also not too comfortable with using root, but that seems the way Proxmox is configured. Also, use rsync or another tool to transfer files this large if possible, not scp. I use it because it is common and the task is trivial.
Now we go in. SSH into the node you copied the cloud image. We’ll basically create a “dummy VM” and add things to it. Most of this is actually what happens when you click things in the Web GUI.
First, let’s create a dummy VM, without the disk image. 9001 is the machine ID I gave (yeah, I tried 9000 on another node before 🙂 ). We want this ID to be far enough from the usual ID range, which normally is around 100; meaning, your VMs would have IDs like 101, 105, 108, sequentially. I chose to add the cpu type here as the default KVM didn’t work with the AlmaLinux I downloaded. This can be set individually for new VMs cloned from this one later as well.
qm create 9001 --cpu host --cores 2 --memory 2048 --net0 virtio,bridge=vmbr0 --name almalinux9-templateNow let’s import the disk somewhere. A “vanilla” install would have local-lvm by default IIRC. My actual flow imports this to a “local-zfs” kind of storage so you should replace the filename and storage name with the ones from your actual setup, but this should work for a standard Proxmox installation:
qm importdisk 9001 AlmaLinux-9-GenericCloud-latest.x86_64.qcow2 local-lvmFrom here, we attach things and configure. You can also do these from the WebUI. Start with the disk. vm-9001-disk-0 is the standard naming, which should have been created by the commands above. Also, this requires virtio-scsi-pci; other types didn’t work last time I checked.
qm set 9001 --scsihw virtio-scsi-pci --scsi0 local-lvm:vm-9001-disk-0Attach the “cloud-init CDROM”. This is not a Proxmox requirement per se, this comes from the way cloud-init works.
qm set 9001 --ide2 local-lvm:cloudinitPoint to the correct boot disk
qm set 9001 --boot c --bootdisk scsi0Set serial for console. Caveat: I haven’t done any troubleshooting but this will work first time you boot, but I had to revert to Default from the second boot
qm set 9001 --serial0 socket --vga serial0 And finally, convert it to a template. Remember that this also is doable fromo the WebUI.
qm template 9001There you go. This is now ready to be cloned to create a new VM.
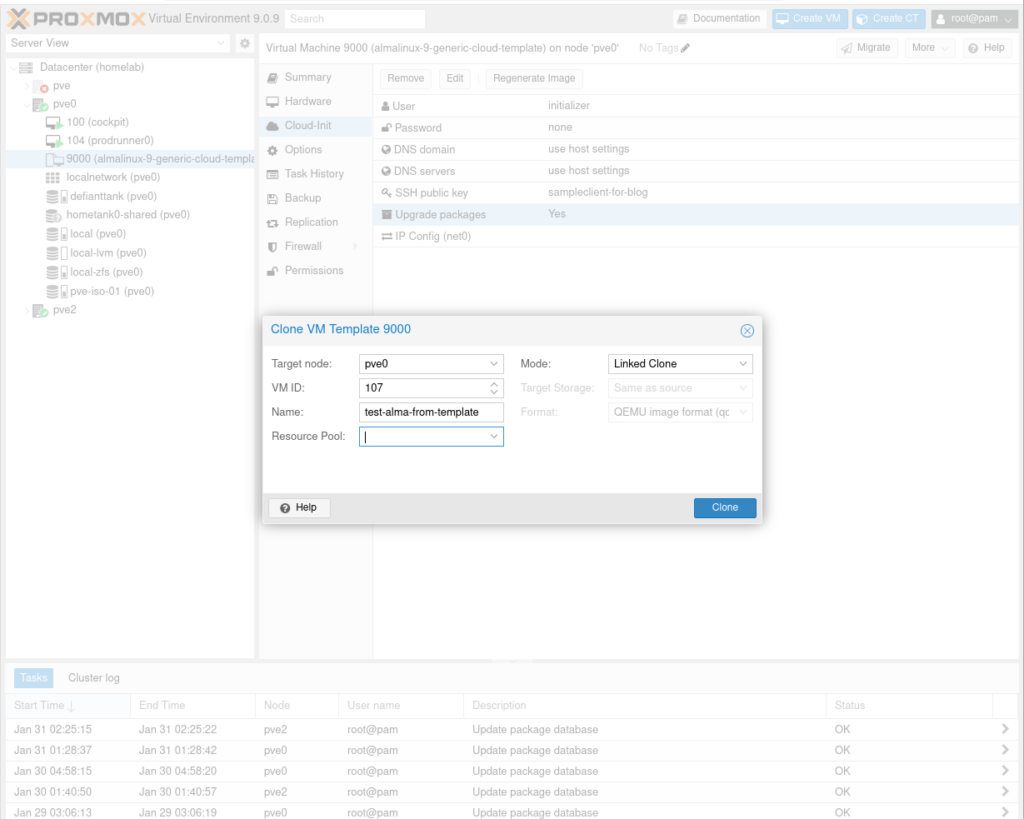
Look at the screenshot; you’ll see “Linked clone” option in Mode. The other option is a Full Clone, where Proxmox would copy the qcow2 file entirely. While it also has its uses, our normal flow uses Linked Clone, where Proxmox only writes “delta”s as you use the new VM. Here is how it works:
- You create the template. Assume it occupies 20GB on disk.
- You create one VM from the template, by cloning it and selecting Linked Clone. Let’s call it VM1. You upgrade that VM, maybe install some new packages, and with use comes logs. Assume you added 2GB worth of data, pushing the VM disk utilization to 22GB. But the first 20GB part is “shared” with the template, so you actually have filled only 2GB more.
- You create 2 more VMs; VM2 and VM3, and your ansible playbooks do things that add 4GB more data. Total disk space used will be 20+2+(2*4)GB, from the template, from VM1, VM2, and VM3, respectively.
- Yet you have 3 VMs running. When you log in to them and check, VM1 is convinced that it has 22GB worth of data on its disk; VM2 and VM3 are convinced that they have 24GB each. If you blindly add them up, you would think you have used 70GB in your storage.
We want to set up one more thing tho, the Cloud-Init tab. Go to your newly created VM, don’t start it yet, and proceed to Cloud-Init tab.
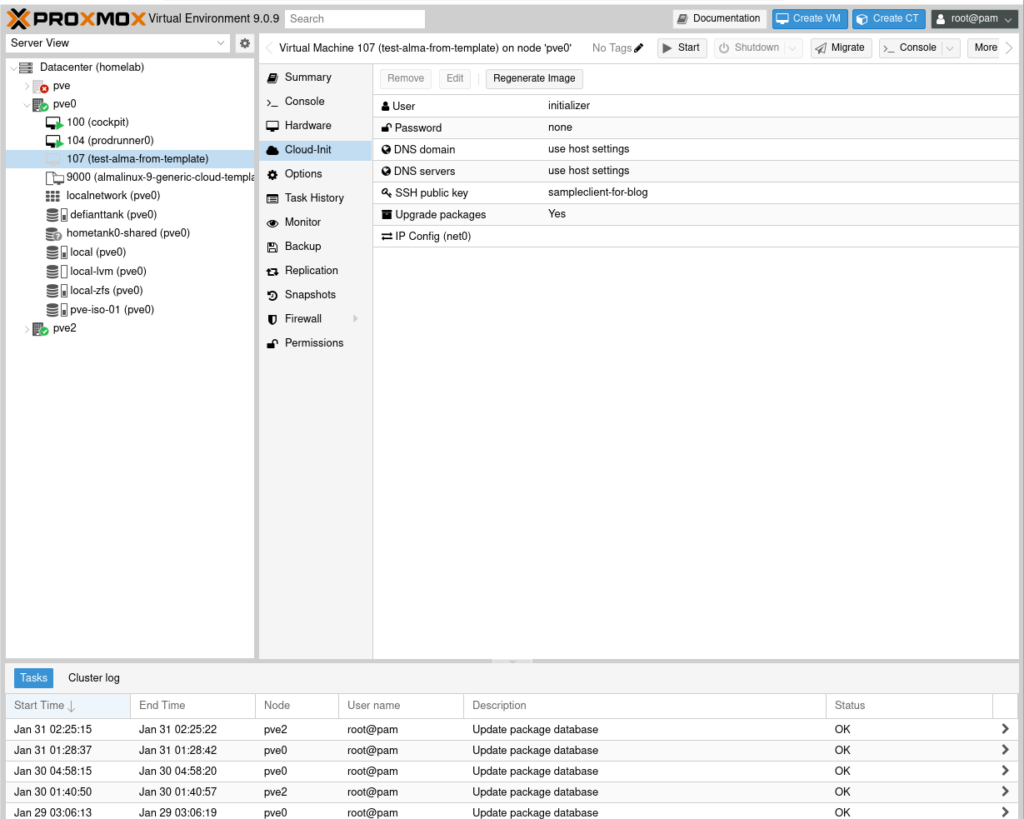
Here, edit the following:
- User: I use some generic username in them as I want to let Ansible take over from here.
- Password: Do enter one (as opposed to my earlier-stage screenshot 🙂 ). With the next field I’ll mention, you will most likely use this user with password only for logging in through the console, but no harm in doing this.
- SSH Public Key: Don’t forget this. Start editing; You can either paste your public key, or upload your public key file (e.g. from your .ssh directory, my-cloud-key.pub)
- Network. Set up depending on where and how you will use this VM. For my setup, it’s simply dhcp.
You can also customize other features such as memory, cpu type, etc. When you’re done, go to Console, and start your VM there so you don’t miss anything. You’ll see that you will have a new machine possibly in seconds.
As I said, most of this could have been done from the WebGUI (maybe except the image import thing, I’ve yet to see the options for adding anything except an ISO in my Proxmox quest), but what I’ve done up to now is scriptable. In fact, feel free to search the web for “how to create template from generic cloud image” with Proxmox keyword. Others have written scripts, or have provided these in a more structured way with variables. This was simply how I learned how to create a template in Proxmox. Also, you can use “snippets” for more operations with cloud-init, but my preference is just to have a minimal golden image, and let Ansible take over from there.
I’ll most likely revisit this part later with some scripting, or more WebUI use information as I learn, but I’m a bit excited to go for the next phase of my little infra migration project, so I’ll leave it here.