We use datasets and ZVOLs to create filesystems and disk partitions within a ZFS pool. More accurately, these are the ZFS equivalents of the concepts we refer to as filesystems.
Dataset
A dataset is the first of the two primary hierarchical structures under a ZFS pool, and likely the one you will use most. You can view it and treat it just like a normal folder. In the video below, I will recreate my ZFS pool (which I reset for this article) and create a few datasets inside it.
You might ask, “it looks just like a directory (folder), so what do we use these datasets for?” For a lot of things. I’ll put it this way: once you start, you won’t even want to create regular folders under your ZFS pool anymore. 🙂
Thanks to ZFS’s conceptual ease, they look like folders. In reality, datasets are individual filesystems.
All datasets share the space in your ZFS pool. This way, you don’t run into trouble by assigning fixed sizes to areas where you can’t predict storage usage only to need more space later.
You can create nested datasets.
You can use them like any filesystem and mount them wherever you want.
You can give datasets quotas and limit their sizes.
If you don’t limit them, you can store data up to the limit allowed by your ZFS pool.
You can toggle different ZFS features like compression and deduplication on each dataset.
You can take backups of each dataset individually.
Creating a Dataset
In ZFS, you create datasets with this simple command:
zfs create /
zfs create tank/mybackups
As an example, I’ll show the laptop I use daily. The ZFS listing command:
zfs list
If you append a dataset to this command, it only shows the contents under that dataset (remember, we could create nested datasets).
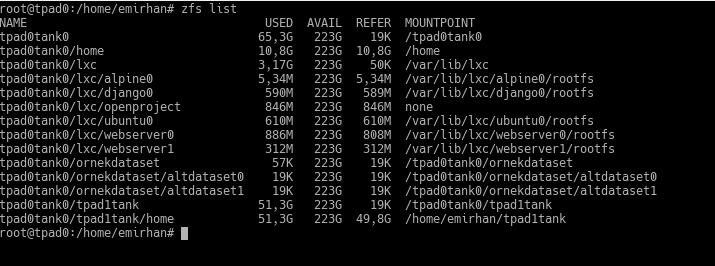
Here:
tpad0tank0 is my ZFS pool. The pool is also the name of the top-level dataset.
tpad0tank0/home is my users’ home directory. Note that it is mounted under /home.
tpad0tank0/lxc is where I keep my LXC virtual machines. Normally, these virtual machines are created under /var/lib/lxc. I have mounted it there. I create a sub-dataset for each machine to easily take individual backups or clones (actually, LXC does that automatically).
tpad0tank0/exampledataset is an example I created for you earlier. It also has sub-datasets.
tpad0tank0/tpad1tank is the disk from my old laptop. I was using ZFS on that too. The migration was very fast this way. 🙂
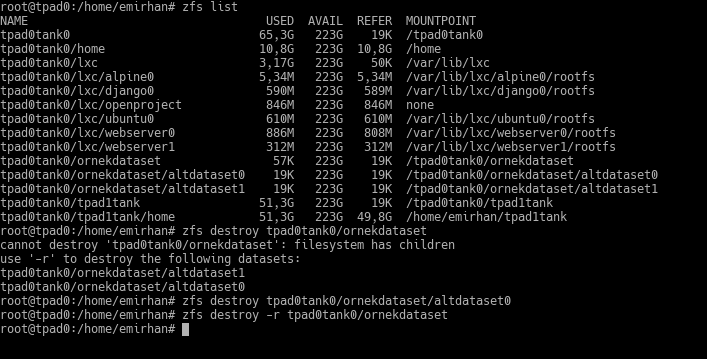
To destroy datasets, you use the zfs destroy command. If there are datasets under that dataset, ZFS warns you and asks you to use the -r flag. If you wish, you can check the sub-datasets and clean them manually before destroying your parent dataset. Or, you can wipe it in one move with the -r flag, whether there are datasets under it or not.
Quotas and Reservations
In ZFS, you can limit the size of a dataset; for example, the size of a share you give to a user. This dataset and the sum of its sub-datasets cannot exceed the size you specify.
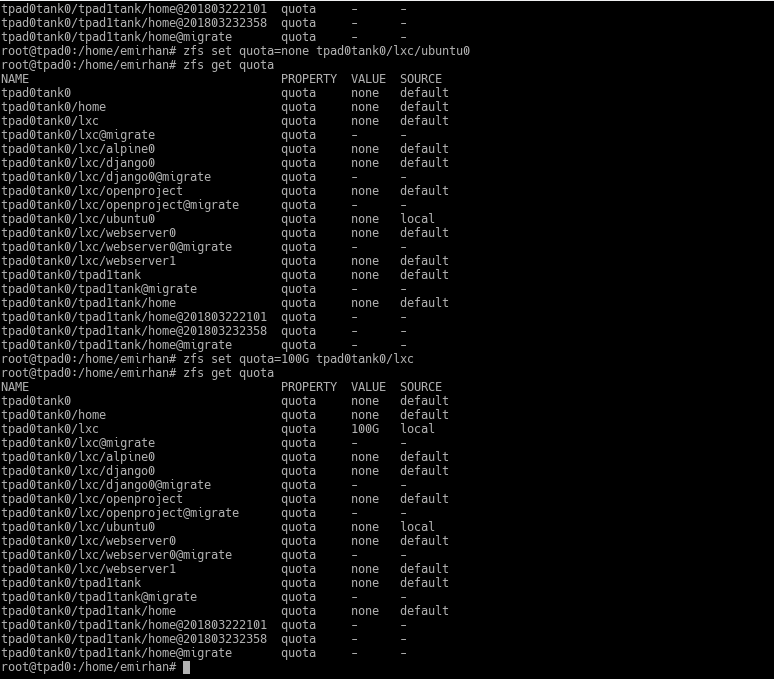
Let’s look at the existing quotas first:
zfs get quota
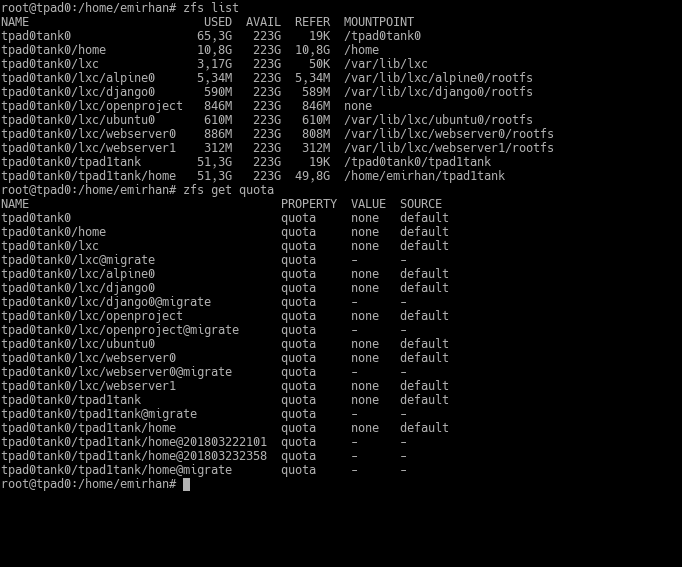
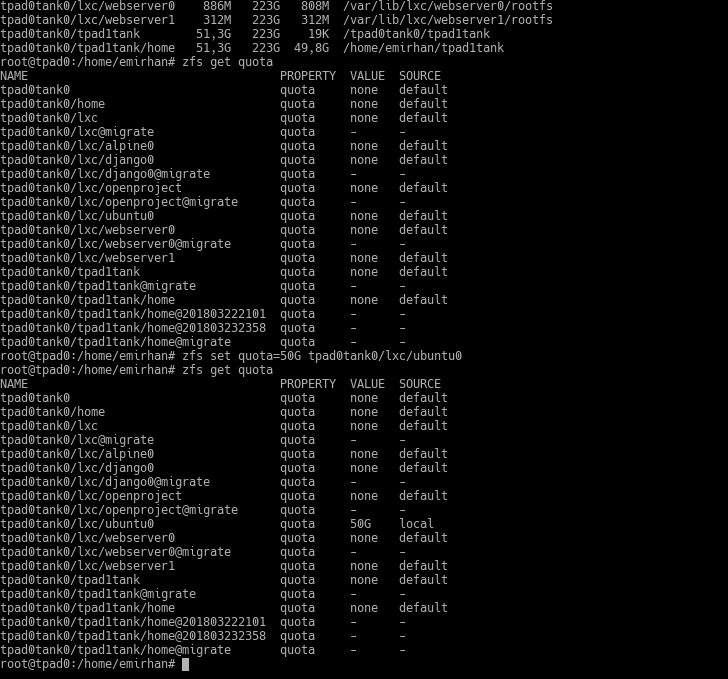
Now, from these datasets, let’s say I want to limit the quota of the dataset named ubuntu0 to 50GB.
zfs set quota=50G tpad0tank0/lxc/ubuntu0
zfs get quota
To remove the quota:
zfs set quota=none tpad0tank/lxc/ubuntu0

Be careful; if I had given this quota to the entire lxc dataset, the total limit of the datasets under it would also be this. However, since they wouldn’t have their own quotas, they wouldn’t show you any quota information.
Reservations
With a quota, you prevent a dataset from taking up more than a certain amount of storage space. If you wanted a certain amount of space to be guaranteed for this dataset, you would reserve that space from the pool.
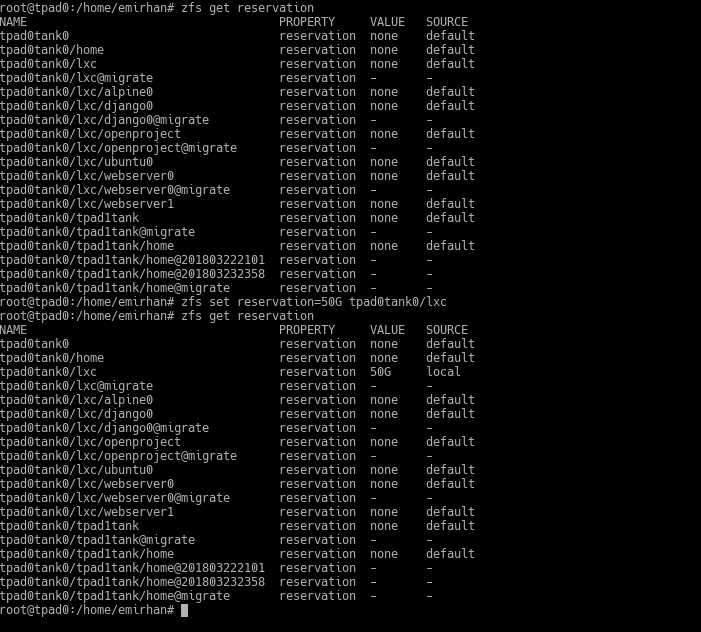
The space you reserve cannot be used by other datasets. This effectively assigns a fixed size to the dataset.
Mounting a Dataset wherever you want
You can mount a dataset in your pool wherever you want (as you saw me do in my previous examples). You just need to provide the dataset’s mountpoint property.
zfs set mountpoint=
Now, as an example, let’s move the user folders of our virtual ZFS test machine under ZFS. You might encounter this situation, for instance, when you newly add ZFS to your system. Since you’re not about to reinstall the system from scratch…
What did we do? Besides the ZFS listing, the basic commands I used are as follows:
zfs create tank/home
mv /home/* /tank/home/
zfs set mountpoint=/home tank/home
I created a dataset in our ZFS pool (tank). I named this dataset home, but it wouldn’t have mattered if you named it something else.
I moved our existing /home directory content—that is, the user home directories—to this new dataset.
I specified the /home directory as the mount point for my new dataset.
We generally use this when migrating system directories to ZFS. This way, we don’t have to do individual work for a bunch of programs using the same directory; for example, we can create a dataset for /var/log. Or we can keep the directories where our web server hosts sites this way.
ZVOL
The ZVOL concept means creating a sub-area under your ZFS pool that you can use no differently than any hard disk partition on your system. You can format this ZVOL however you like (meaning you can put any filesystem you want on it). You can create and destroy ZVOLs with the following commands:
zfs create -V 8G tank/myzvol
zfs destroy tank/myzvol
Note that we provide disk space while creating it. This will be a block device, no different from any partition on a disk in the system. So, it needs a size.
Besides being usable like any partition on the system, the ZVOL we create will benefit from ZFS features like snapshots, compression, deduplication, and caching. Let’s create our example, format it with the Ext4 filesystem, and mount it somewhere.
One of the use cases for this ZVOL business is creating a swap partition. Another is to perform installations in their own filesystems for applications that don’t support ZFS—for example, the Linux version of MS SQL Server wasn’t running on ZFS the last time I checked. After trying with a ZFS-based virtualized Ubuntu machine, I created a ZVOL, formatted it with XFS, and was able to install MS SQL Server there.